Tuesday, September 10, 2013

$2 Faux Wrap Dress Makeover

I picked up this little blue number for $2 at the same thrift shop as my other refashion projects.  The simple blue color caught my eye.  I liked the white-trim, too, but couldn't think of a way to reuse it.

I knew this was going to be my most challenging makeover because it's so plain.  I needed to think of a way to make it pop!


With all my brainstorming and trying this and that, I didn't stop my thought process to take any snaps.
But, to recap..

Step 1: Remove shoulder pads, sleeves, lapel and first two buttons.
Step 2: Take up the hem about 4 inches.
Step 3: Take in the sides for a snugger fit.
Step 4: There was enough material to wrap to around my waist.  So, I sewed a couple of hooks on the inside by the waist side.  This will be used to secure the wrap dress.

I kept the buttons on the skirt because I thought it gave it a little 'something'.  Then I paired it with a little bling-bling: gold belt and necklace.

I love my 'new' dress!


Monday, September 2, 2013

Double-sided Headband Organizer

I rarely buy headbands for the girls.  However, they still end up with tons and tons of headbands and hair accessories from Christmas, Birthdays, or whatever.  A simple basket used to be enough to contain the madness.  However, the headbands have multiplied and I now have a headband outbreak on my hands.  This is serious stuff.


This is the out-of-control basket of hair accessories.  I think I could open up my own Claire's at the mall with all of these accessories.  Geez...

I rummaged through my fabric stash and found a colorful, girly fabric and some matching ribbon.  This will surely do the trick!

Step 1:  Cut two pieces of fabric the size of a long rectangle.  With the right sides together, sew up both long sides.

Step 2: Cut a piece of ribbon twice the size of your rectangle.  This will be used to hang the headbands.
Step 3: Cut a small piece of ribbon.  This will be used to hang your headband-hanger.

Step 4: Layer the ribbons on top of each other.  Tuck the ribbon inside the short end of the rectangle and pin it into place.  Then stitch the raw edge making sure the catch the ribbon.

 Step 5:  Turn the fabric inside out.  Start pinning the ribbon so that it runs down the middle.  Do this on both sides.

Step 6:  Using a reinforced straight stitch, sew every 1.5 to 2 inches. 

Step 7:  When you get to the end, fold the raw edge inside and topstitch.

Ta da!  In about 30 minutes, you have yourself a double-sided headband organizer!

 Let's see how long it takes for the girls to break/ruin my masterpiece. 


This is the first time I have made one of these.  Some things I would have done differently:
1. Provided more slack in the ribbon.  This would accomodate wider headbands to be stored without bunching up of the fabric.
2. Sew the ribbon to each side separately before assembling it all together.  It was a little difficult to align the bottom ribbon and make sure I sewed through it.


Saturday, August 31, 2013

$2 Pretty In Pink Dress

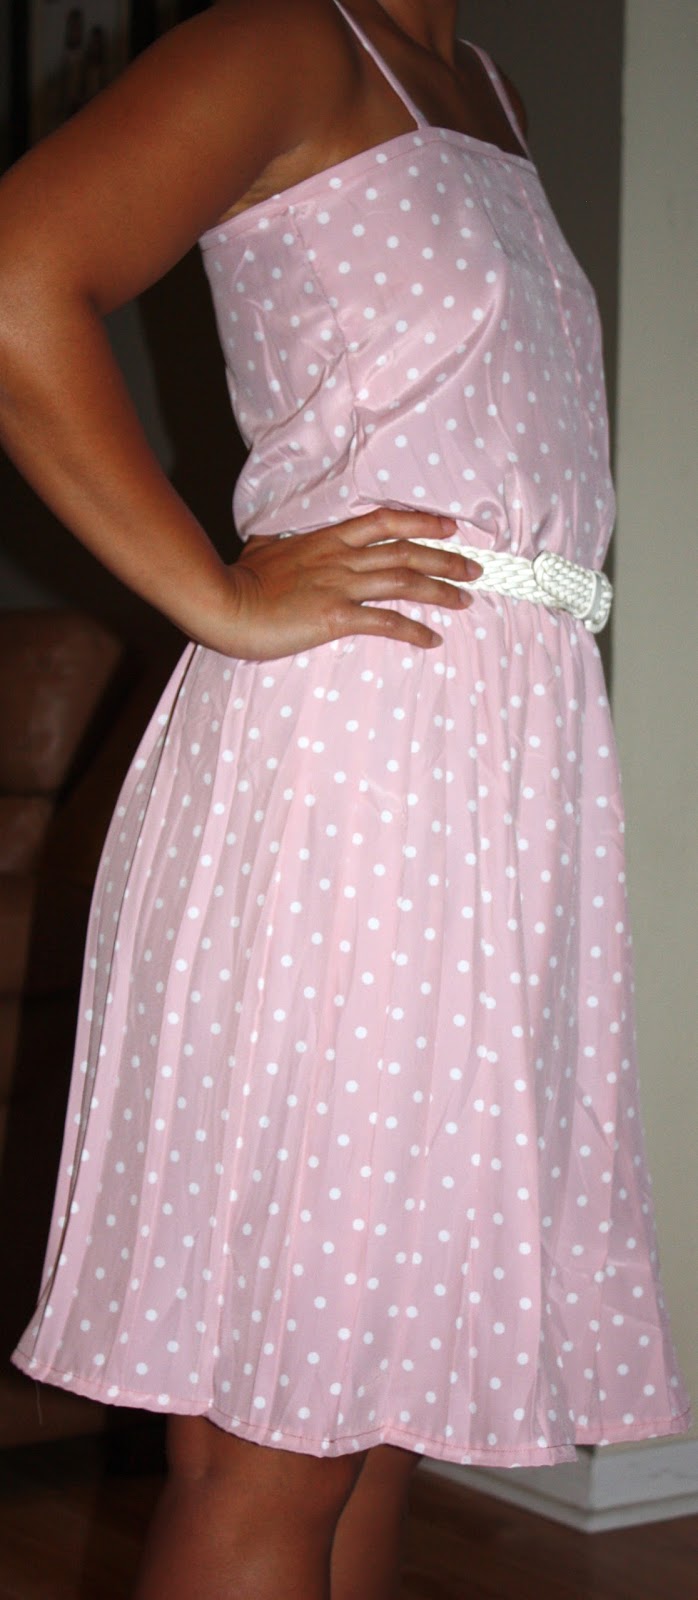
Here is another $2 dress that I bought at the same church thrift store as my red dress.  The things I loved about this little pink number were the cute little polka dots, the beautiful pleated skirt, and the light and airy fabric.  The things that I could live without are the shoulder pads, the belt, and that 'weird sleeve thing'.  Because of these flaws, I proceeded with the mutilation (errrr, I mean, mutation) of this dress...

Let's just skip to the end of the story and see the side-by-side 'before' and 'after' picture.  Wow!

When I started ripping this dress apart, I wasn't planning on making it a spaghetti-strap dress.  I slowly removed a piece at a time, until I liked it.

Step 1:  Remove the shoulder pads.  I wasn't planning on playing tackle football in my 'new' dress.

Step 2: Rip the seams and remove the sleeves.

Step 3: I took off about 4 inches from the hem.  I used the scraps to make the straps for my dress. Scrap straps!

Step 4:  After making all my cuts, I tried on my dress again.  The neckline just wasn't flattering.  So, I chopped it off.
The front of the dress was a button up.  So, I removed all the buttons and sewed up the front.
I sewed the straps to the dress and also took in the sides.
 

Here are photos of my new and improved 'Pretty In Pink' dress!  (The white leather Nordstrom belt is from Goodwill.  I think it was $3.)

Thursday, August 29, 2013

Red Dress Makeover

I stumbled onto a new blog the other day called 'New Dress A Day'.  The writer goes to thrift stores and purchases the most hideous outfits and turns them into the most amazing creations!  I was quickly inspired!

I found this red dress at a church thrift store for $2.  The first thing that caught my eye was the bright apple red color.  I also fell in love with the little square pattern.  It really makes the dress 'pop'!  After finishing the dress, I realized that it had pockets, too.  (What a bonus!)

Some things I didn't like about the dress was the long length, the too matchy-matchy belt, the long sleeves, the 80's shoulder pads and the loose fit.  It kind of reminds me of the witch in the Wizard of Oz.

Here is a side-by-side photo of the 'before' and 'after' dress.  It took only one evening to complete this dress makeover.  Although, by the time I got to hemming the dress, I got a little lazy.

Here is a close up of the beautiful fabric.  Love the squares!


Step 1: Rip out those 80s shoulder pads.


Step 2:  Shorten the hem so that it hits slightly below the knees.

Step 3: The top was a little droopy.  So, I pinned it up at the shoulders for a tighter fit.

Step 4: I wanted to take the sides in a bit too.  I just put the dress on and pinned it in.
Once I had everything pinned where I wanted it.  I took it to the sewing machine!
Here is a picture after I cut out one of the sleeves.


I also bought a gold belt ($3) and a scarf holder ($1.50). ...whoa, it just hit me, that the belt was more expensive than my dress!  Geeeez.
In the picture, you can see that the belt is missing the face.  So, I decided to use the scarf holder to cover it up, until I can find a permanent fix for the belt. 
I love my $2 dress and can't wait to wear it somewhere!


Monday, August 26, 2013

Monogrammed Pillows

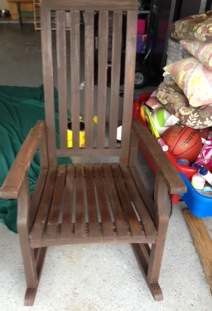
I bought a couple of rocking chairs on Craigslist a couple of years ago.  Since then, we've repainted the exterior of the house.  So, my brown rocking chairs and pillows no longer match the house.  This is a craft emergency...

Here is a BEFORE picture of the rocking chair.  To the right, you can kind of see the four pillows. 


Step 1: Stain the rocking chairs with a nice black stain.
Step 2: Sew new seat covers to wrap over the old seat cushions.
Step 3: Sew new pillow covers to wrap over the old back pillows.

Somewhere between Step 1 and 2, a light bulb went off.  After sewing the seat covers, I had enough leftover material to do something great...something awesome.  I wanted to use the leftover material to add a monogram to the pillows.

Step 3a:  Iron fusible interfacing to the back of the leftover seat cushion material.
Step 3b:  Cut out the monogram letter. I cut out an Old English 'A' using my Silhouette.
Step 3c:  Sew the letter to the pillow fabric using a zig zag stitch.  Make sure the letter is in the middle of the pillow.

Step 3d.  Continue sewing the pillow covers.

It turned out better than I imagined!


Friday, August 23, 2013

T-shirt makeover

Every year the girls are given school t-shirts.  As with most t-shirts, they are usually too big and too 'blah' for my two little divas.  So, every year, I try to pimp them out.  I didn't sketch out a game plan, I just started cutting away.  In retrospect, I think next time I'll surf the web for a design before I start.

1.  Here is the t-shirt before in its original state.  It's cute...but we can do better.

2.  Grab a shirt that currently fits your child.  We will use this as a template so we know how much to cut the shirt.  I just lay the shirt on top and make a guesstimate.

3.  Cut the shirt based on your template.  (We will add shoulder straps and ruffles using the extra material.

4.  Turn the shirt inside out so that the fronts are facing each other.  Sew the sides of the shirt together.

 5.  After the sides are sewn, it should look like this.  This picture just shows you that the sides of the shirt has been stitched.

5.  Use your left over fabric and cut 1-1/2 inch strips.  We will use these to make the ruffles.   You will probably need four strips.  (Two strips for the top of the shirt.  Two strips for the bottom of the shirt.)

6.  Baste stitch down the middle of the fabric strips.   Then gather to make cute little ruffles.

7.  Use the leftover fabric and cut two strips from the sleeves.  We will use this to make shoulder straps.  It will also give us a based to sew the ruffles on.

8.  Sew the shoulder straps onto the shirt.
9.  Sew the ruffles around the top and bottom edges of the shirt.

Here is the finished t-shirt.

Here is a picture of last year's t-shirt makeovers.  The one on the left was converted into a dress.  The one of the right, had two layers of ruffles on the bottom.