Saturday, September 28, 2013

Etched Shot Glasses

A dear friend of mine was turning 40.  I didn't know what to get for the girl that has everything.  I turned to my crafting skills to make her something special and personal...

My intention was to do glass etching on beer glasses.  So, I headed over to Pier 1.  (I don't shop their often, but I had a gift card to use!)  I perused through their clearance section to see if there were any beer glasses up for adoption.  Then, lo and behold, I stumbled upon my future project: 12 shot glasses for $8.  They came with 12 little spoons, too.  So, I guess they are actually little appetizer thingies.  Gotta love dual purpose items!

There was nothing wrong with the shot glasses other than it was missing the box.  And this just gives me the opportunity to craft a nice gift box!

12 shot glasses w/spoons; 75% off at Pier 1

Step 1: Figure out what to etch onto the glasses.
This is the fun part!  I spent a couple of hours just playing around with different designs.  I tried to choose designs that represented the birthday girl.

Step 2: Cut out the stencils.
After I came up with 12 different designs, I used my silhouette to cut out the stencils.  Then I covered the stencil with transfer paper.  This is the easiest way to transfer your designs perfectly onto the glasses.

Step 3: Wash the glasses.
Before, applying the stencils to the glasses, I washed the glasses with dish soap to remove any debris or fingerprints.  Then used a towel to dry them.

Step 4: Apply stencil to the glasses.
Remove the backing of the stencil and adhere them to the glass.  Then remove the transfer paper from the top.

Step 5: Apply painters tape around the stencil.
To avoid accidentally etching the surrounding area, border the stencil with painters tape.
All taped and ready to be etched!
Step 6:  Apply etching cream.
I picked up Armour Etch from Michael's with a 40% off coupon.  Use a popsicle stick to liberally apply it over the stencil.  Be careful that it doesn't drip  onto any unwanted areas.

Step 7:  Wait 5 minutes.
After I applied all the etching cream to all of the glasses, I waited 5 minutes.
5 minute break
Step 8: Rinse the cream off.
Using warm water, rinse the etching cream off of the glasses.
Pics after the etching cream was rinsed off


Step 9:  Remove the painters tape and stencil from the glasses.

Step 10:  Sit back.  Say 'Oooh'.  Then say 'Aaaaah'.


Friday, September 20, 2013

Salsa Recipe

Today's blog is non-craft related, but still a good read!

Anytime there is a gathering, dear hubby always asks that I put together some salsa and/or guacamole.  They are both very easy to whip up and always a hit.  I've been asked on a few occasions for the recipe, so I thought a salsa recipe post would be apropos.  This is a recipe given to me by my mother-in-law.

The recipe yields a large party-size batch of salsa.  I would suggest cutting the recipe in half, unless you've invited the entire neighborhood over.

Ingredients:
- 1 onion
- 5 to 6 cloves of garlic
- 1 bunch of cilantro
- 1 jalapeno
- Stewed tomatoes (four 14.5 oz cans)

You will also need your handy dandy food processor to finely dice the ingredients.  (I've tried hand dicing this recipe before and, trust me, it doesn't come out as good.)  So, unless, you went to a Culinary Art School and got an A+ in Slicing & Dicing 101, please whip out Mr. Food Processor.

Step 1: Peel and lightly chop up the onion.  Throw this in the food processor.

Step 2: Peel and lightly mash the garlic.  Throw this in the food processor.
It's up to you how much garlic you want to use.  If you have vampire-like tendencies, then use less.  I, for one, do not hail from the town of Transylvania, therefore, I like lots of garlic.

Step 3: Wash the cilantro to remove any dirt or grit.  Then wring the water out of the cilantro.  Remove the leaves from the cilantro and throw it into the food processor.  Discard any of the tough stems.

Step 4: Wash the jalapeno.  Remove the seeds.  Cut them up and throw it into the food processor.

Step 5: You should now have the onion, garlic, cilantro and jalapeno loaded into the food processor.  Turn that bad boy on and let the magic begin.. Everything should be very finely diced.


Step 6: Transfer the mix from the food processor into a large bowl or Tupperware container.  (I used a 14-cup Tupperware container so that I could store it in the refrigerator.)

Step 7: It is very important to use STEWED tomatoes.   (I used diced tomatoes one time and it didn't come out as good.)  These have jalapeno, garlic, and cumin in them.  Open up all four cans.


Step 8: The stewed tomatoes will have some liquid in them.  Drain the liquids into the tupperware.  Then dump the stewed tomatoes into the food processor.

Step 9: Finely puree the stewed tomatoes.

Step 10: Dump the pureed stewed tomatoes into the tupperware.  Mix everything together.
You can either serve immediately, or stick it in the refrigerator to let all the flavors marinate.

Step 11: Don't forget to clean up! Recycle those tomato cans.  And throw the vegetable scraps into your compost.  Those worms will thank you for it!


Fun fact:  The kids love eating macaroni and cheese (and so do I).  When I make it for them, there is always a little bit left over for me.  I throw a couple of spoonfuls of salsa into the macaroni and cheese.  It's delicious.  :)


Tuesday, September 17, 2013

Japanese Knot Purse

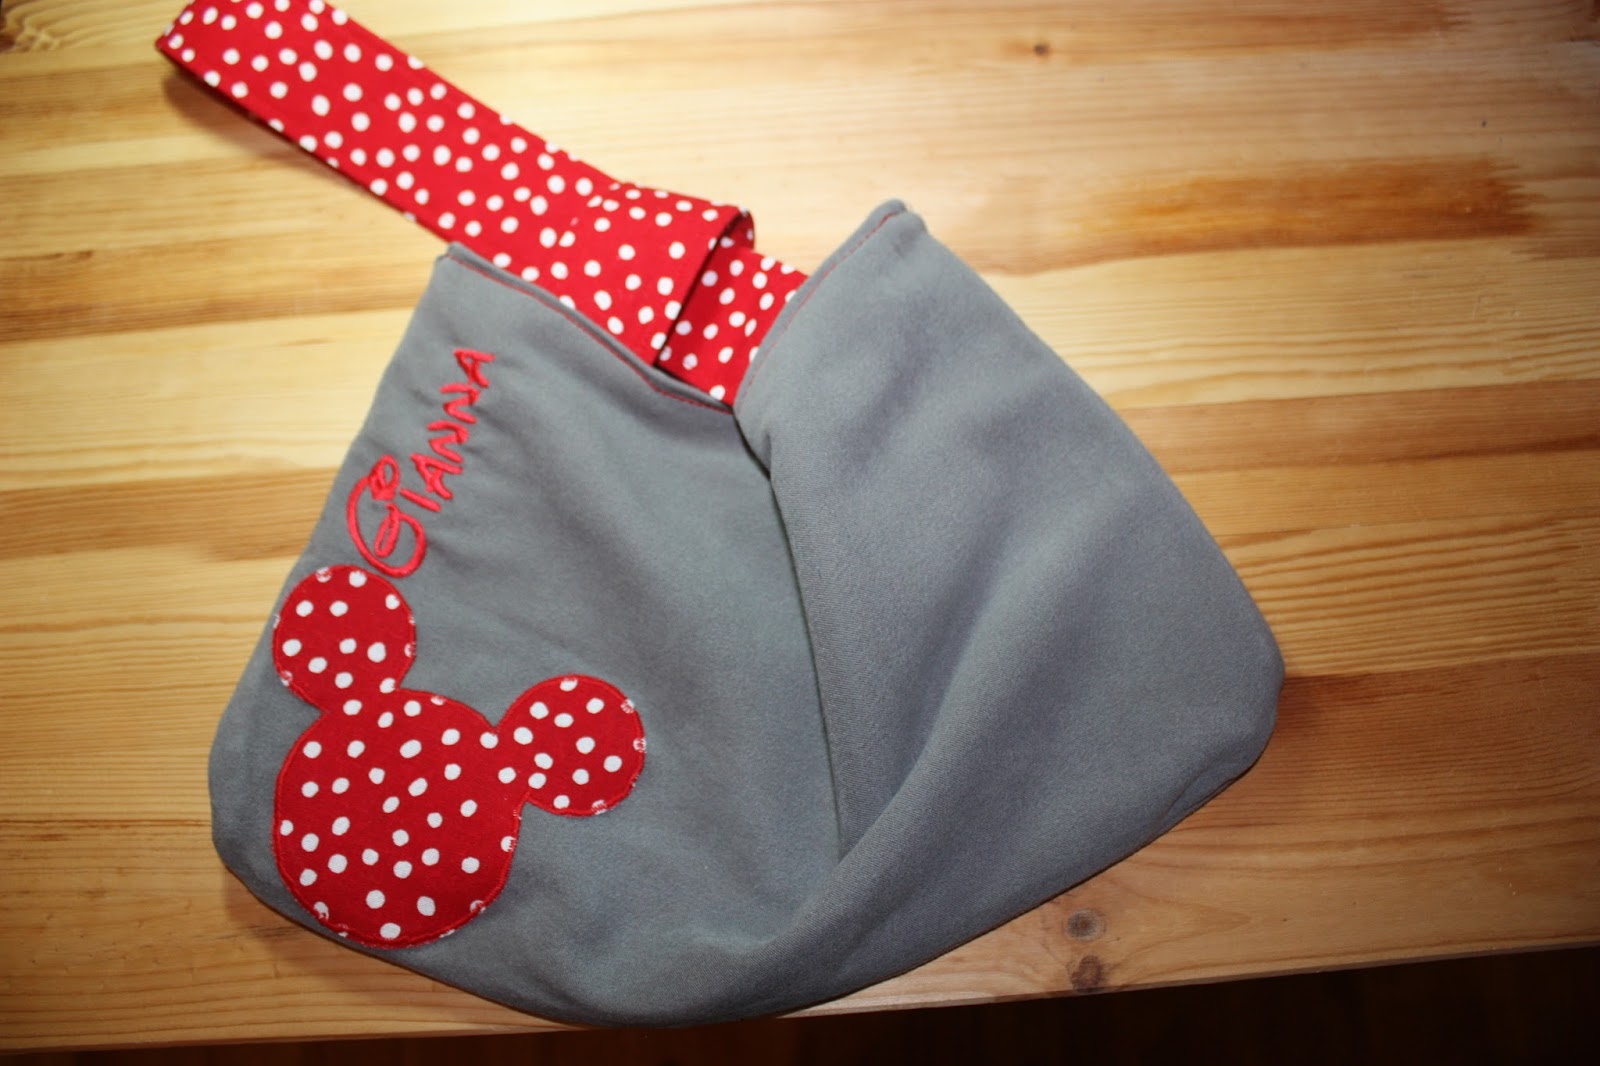
While I was surfing the internet the other day, I came across a cute little purse!  It was a Japanese Knot Purse.  It was different and looked easy to make.  So I did!

I rummaged through my scrap fabric and found a nice gray that would do the trick.

Step 1: Cut four 9" x 16" rectangles.  Two pieces will be for the outside of the purse.  The other two pieces will be for the purse lining.  The purse will be about 8" x 15".  This will give us a 1" seam allowance.

Step 2:  To round out the bottom corners of the purse, I place a circular object (in this case, a spool of ribbon) in the corner and traced it with a fabric marker.  Then cut!


Step 3:   Sew all four layers together.  Sew only 3/4 of the way around.  Leaving the top.  Then turn the purse right-sides out.

I wanted to add an applique to the purse.  So, I found some more scrap fabric.  Then ironed on some heat transfer material to the back of it.

I downloaded an image off the internet and cut it out using my Silhouette.

I embroidered the purse with a name and then ironed on the applique.  I finished the applique with an embroidery stitch.  (In restrospect, it would have been easier to embroider the name BEFORE sewing on the pieces together.)

Using more scrap fabric, I sewing two purse straps.  One short one and one long one.  To wear the purse, just loop the long strap through the short strap.


This is a simple purse that didn't take long to make.  And it gave me some practice on my embroidery and applique skills!


75 cent Peek-A-Boo Back Dress

I'm always on the lookout for a new thrift store to explore.  On Labor Day, dear hubby and I were driving through Clearwater when I spotted a church thrift store on the other side of the road.  Out of the kindness of his heart, he made a U-turn so I could check it out!  On that particular day, they were having a 75% off everything sale!  You just can't beat that deal.

I picked up this little number for about 75 cents!  I really liked the pattern and the pleated bottom.  But, it was shapeless and needed to be revitalized!


There are three simple things to make any dress better:
1) Remove the sleeves
2) Shorten the hem
3) Take in the sides

After you do those three things, try on your dress every which way...backwards, upside down, sideways.  This particular dress had buttons down the front.  I decided to wear my dress backwards and make it a backless dress.

The fabric was a light polyester which frayed quite a bit.  I don't have a serger, but a simple zig-zag stitch works to tame those raw edges.

I chopped off the top of the dress and made a casing in the front and two casings in the back.

After I shortened the hem, I used the leftover scrap fabric to make a thick band.  I slid the band through the casings and sewed it closed.

 What can you buy for 75 cents that is cooler than this dress?


Thursday, September 12, 2013

Machine Embroidery 101 (Go Bulls!)

Per my husband, I've got to 'perfect' my embroidery skills before I can start embroidering on new items.  For now, I'm scrounging around the house looking for my next victim to go under the needle!

Today's victim is a yellow gingham kitchen/dish rag.  It's been sitting at the bottom of my linen closet waiting for it's moment to shine.  And now is the time...

This is my second embroidery project.  I wanted to do something for my Alma Mater.  Go Bulls!  I wanted to do something a little different, something that you couldn't buy at the stores.  Way, way, waaaaay back when I went to USF, people used to refer to it as the 'University of Suntans and Flipflops'.  I always thought that was so cute because when you're roaming around on campus, that is pretty much what you see - suntans and flipflops!


Step 1: Research, research, research...I am very new to machine embroidery, so I spent a few hours reading other blogs and watching a few YouTube videos to help me get started.

Step 2: Create my USF embroidery logo - There are lots of sites where you can buy embroidery files.  Why 'buy', when you can 'create'?!  I downloaded a 30-day trial version of the SewArt application.  This app converts images into embroidery files for you.  With the help of this YouTube video, it was seeeeeew easy to use!

A quick Google search led me to tons of USF logos.  I just downloaded one and ran it through the SewArt application.  It spit out a .DST embroidery file that my sewing machine can understand.

Step 3: Transfer the embroidery logo from your computer to your sewing machine - Via USB, I connected my sewing machine to my laptop.  I transferred my beautiful USF logo to my sewing machine.

Step 4: Create an awesome design - I'm still a newbie, so it took me a while to put the design together.  But, it was a good learning experience with using different fonts, resizing, scaling, etc.
I used an existing font that was already built into the machine.  But you can easily download fonts and convert them to embroidery fonts, too.


Step 5: Push the START button and watch the magic - After I was happy with my design, I carefully, laid my fabric and stabilizer through the embroidery hoop.  I made sure the fabric was centered and the stabilizer was taut.  I pressed the START button and let the machine go to work.


Step 6: After it's done embroidering, it's time to clean up the little stragglers. On both sides, I cut as much of the excess thread as possible.


Step 7: Gently, tear away the stability on the back.

TA-DA! Shine, little gingham rag, shine.

Lessons learned:
I had a little trouble with the thread.  My machine came with some free embroidery thread.  But it was hot mess when I opened it.  I used it anyways, but the thread kept getting stuck.  If you look closely, the letter 'l' is a little messed up.  The moral of the story is - don't used messed up thread :)